How to draw the sea with a pencil step by step. How to easily draw a seascape with gouache in half an hour How to draw a raging sea

Only an experienced artist can draw the sea, accurately convey the color and power of the water element. An artist who paints the sea is called a marine painter and draws various types and conditions of the sea and learns this all his life. The pictures of the sea painted with paints, gouache or watercolor, and preferably with oil, very accurately convey the whole gamut of shades and the depth of the color of the sea. The sunset on the sea looks especially beautiful in colors. But let's start step by step draw the sea with a simple pencil.
Drawing the sea is not easy, especially with a simple pencil. It is difficult to convey sea waves and surf with a simple pencil. With a pencil, this can only be done through the technique of strokes. You will need to constantly rub the strokes with your finger or a hard eraser.
1. First, select the main contours of the sea

First, select the horizon and the main contours of the coastline of our composition. On the shore, immediately draw the contours of coastal stones. Then we will separate the horizon line of the sea and draw a line of the beach and draw the sun. You can also draw the contours of small waves around the stones.
2. "Scatter" the sea waves in the picture

Now we need to draw the initial contours of the waves throughout the space allotted for the sea in our drawing. Make strokes with a pencil all over the surface of the sea, but you should not make too many of them, otherwise the waves will not turn out large.
3. Shade the water surface with strokes of a soft pencil

At this stage, we need to draw and shade with strokes the contours of the waves near the stones. To soften pencil marks, you can rub them with your finger or a hard eraser. The shaded part of the sea can also be rubbed with a piece of paper or a finger.
4. Sand on the coastline

Now we will pay attention to the coastline of the sea. In our picture there is a sandy beach by the sea, but you can draw another one. Just like the surface of the sea, sand should be shaded with pencil strokes, slightly rubbed. If necessary, you can remove excessive blackness in some areas of the sea, again with the help of an eraser. After that, you can "color" the stones, strongly shading them, and draw small clouds.
5. How to draw the sea. Clouds

At this stage, we will not draw the sea, but what is above it - the sky and clouds. If necessary, in some areas of the sea, you can slightly wipe the strokes with an eraser vertically, this will give the sea additional highlights. But first, add a few small free-form clouds with weak strokes to emphasize the movement of air. Draw the sun, such a "trifle" always makes any drawing more attractive and realistic.
6. Drawing the sea on a graphics tablet

Now you know how draw the sea with a simple pencil and you can try to make another drawing and paint it with paints, as in this color picture of the sea, made by me especially for this lesson on a graphics tablet.
Video how to draw the sea.
Of course, the drawing of the sea will look much more beautiful if you can draw a sailboat in the distance. In this lesson, you will learn how to draw both the sea and a sailing frigate.
Wandering the seas on sailboats, the pirates made caches of stolen treasures, many of which have never been found. Perhaps these treasures never existed. But not only to indicate the location of an island with treasures in the sea, maps were used by pirates, they were used primarily for navigation.
If you decide to draw a picturesque seascape, draw dolphins. These sea animals are sure to turn out beautiful if you draw them in stages. Draw the contours of the sea and dolphins with a simple pencil, and then paint the entire drawing with paints.
The turtle lives in the sea and is probably the most ancient inhabitant of the seas. For all the years of evolution, turtles only learned to go on land to lay their eggs, but they did not leave the sea forever, like other animals. In this lesson we will try to draw a turtle by the sea on our own.
A mermaid is half a fish, half a person, so you need to draw a mermaid not only a tail, but also fish scales on it. A prerequisite for a picture of a mermaid should be the presence of a reservoir, because they live in a river or on the sea.
Want to learn How to draw a sea with a pencil step by step, take a few simple steps.
Video about drawing the sea with a simple pencil step by step for beginners. I also advise you to draw a ship with a pencil on the theme of the sea.
Subscribe to our youtube channel and be the first to watch the video tutorials!
STEP 1. As in my previous lesson on how to draw an ocean; start this step, depicted the horizon line. Of course, we want to draw viewers' attention to the oceanic space of this landscape; so I just cut off most of the sky to watch. Draw long, curved lines that will separate the water from the ground.

STEP 2 Here you will want to draw the land and sea dividing points. Start sketching out the waves that are flush with the sand. After you move your way up to the vanishing point, draw in some rocks to give the landscape a more "oceanic" feel. To give this view an expansive look, add a hill-like structure in the distance.

STEP 3. Finally, draw the foam area that surrounds the waves. This drawing will definitely add realism to your ocean scene. Sketch the detailing on the stones so you have unity with the amount of detailing encoded into the waves. Feel free to add some extra sand dunes to mesh with the grass. Don't leave the sea for a bit! You could perhaps add some stall crabs to the water!

STEP 4. If you completed this lesson correctly, then your drawing should look something like this. Erase the guidelines that were grayed out and you should be set to start polishing! Get a good pen (preferably um) and start inking your drawing of the sea! Adding a couple of colors would give this drawing a nice look. Another cool idea to add a character that grazes in the vastness of the ocean. There are so many possibilities that he's a bottle on the head. Hope you enjoyed this tutorial, thanks for watching!
In this lesson we will introduce you how to draw the sea with gouache step by step in pictures and with a description. Step-by-step steps will be presented with the help of which you will learn how to draw a sea with gouache, like this.
You can draw waves on the sea if you understand how the wave moves. Let's draw the background first. Draw a horizon line just above the middle. Smoothly paint over the sky from blue to white near the horizon. You can draw clouds or clouds as desired.
To make the transition smoother, paint part of the sky with blue paint, part with white, and then use a wide brush with horizontal strokes to mix the paint on the border.
The sea itself will also be painted over with blue and white paint. It is not necessary to apply strokes horizontally. There are waves on the sea, so it is better to do strokes in different directions.

Now mix green paint with yellow and add some white. Let's draw the base for the wave. In the picture below, the darker areas are wet paint, just the gouache has not had time to dry.

On the green strip, we will distribute the movement of the wave with a hard brush with white paint.

Please note that the left part of the wave has already fallen into the sea, next to it is the raised part of the wave. And so on. Let's make the shadows stronger under the fallen part of the wave. To do this, mix blue and purple paint.

Mixing blue and white gouache on the palette, draw the next falling part of the wave. At the same time, we will strengthen the shadow under it with blue paint.

Let's outline the front wave with white gouache. 
Let's draw small waves between large ones. Draw blue paint shadows under the near wave.

Now you can draw the details. Spray the foam along the entire wavelength with a brush. To do this, take a hard bristle brush and white gouache. There should not be much white gouache on the brushes and it should not be liquid. It is best to smear your finger with gouache and blot the tips of the brush, and then spray in the area of \u200b\u200bthe waves. It is better to practice on a separate sheet so that you can direct the spray to a specific place. You can also use a toothbrush for these purposes, but the result may not justify the result, because. the splash area can be large. But if you can do it, then that's good. Don't forget, try the splashes on a separate sheet.

The question "How to draw the sea?" not only artists are asked. Almost everyone who admires sea views wants to somehow capture this gift of nature, which just asks for canvas. Or at least the camera lens.
A little help. Landscape in art is a genre in which nature is depicted. Landscapes are also called individual paintings of this genre. The landscape can be urban - here nature has already been transformed by man to suit his needs, or, for example, rural. If the sea is depicted, then such a landscape is called a marina. And artists, respectively - marine painters.
So let me give you some helpful tips. In this article, our main task is to include observation, as well as consider some of the laws of composition and color solutions.
1. Horizon
Do you know where the horizon is? Do not read the answer right away, think, try to answer intuitively. Far away, where the sky turns into the sea? Or where does the earth end? Here and no. The horizon is always at the level of our eyes. You can check today on the street, especially if you are outside the city, where the horizon is clearly visible. Squat down, stand up - the horizon will move with you.
Where should it be placed on the sheet? in the middle? Not worth it. The answer to this question has long been found by artists. You need to decide what is more important (more beautiful, more interesting) - the sky or the sea? If the sea, then a greater place for him, and if the sky, then the sky. It is better to solve the horizon issue according to the so-called "rule of thirds", try it, you will not be mistaken. Divide the sheet into 3 parts vertically, draw two lines. If you are more interested in the sea, it will occupy 2 parts, if the sky is it. A perfect example: the third part is given to the sky, the third to the sea, the third to the beach (sand):

And here is more of the sea:

Of course, the sky can also prevail, especially this:

2. What is darker?
Before drawing a seascape, it is important for an artist to decide the question - which is darker, the sea or the sky? And stick to that contrast. Both the sea and the sky have blue shades, so the question is very important. And they solve it, as a rule, towards the dark sea.

3. sky drawing
The sky is quite easy to draw - look at the sky carefully and you will understand everything. It is usually dark blue at the top, and gradually brightens towards the horizon. As in the photo above. Therefore, we simply add gradually lightness to the sky, from top to bottom it is sometimes almost white.
4. Clouds
They are usually depicted as white. First, juicy strokes of white paint are usually made without water and solvent. Then, downwards, they can be smoothly rubbed into the sky with a very dry brush (another one) or the bottom of the clouds can be made light purple-gray. All transitions are smooth.

5. Sea
The sea is also drawn from dark to light. Near the horizon, it is dark blue, which creates an excellent contrast with the sky, and the depth of space. You can just take blue paint without mixing it with anything. Then, closer to the third part of the sea, we add a little emerald green and white to the blue, more and more brightening and “greening” the water to the shore.

6. Sand.
Sometimes they don’t draw it, but if there is a desire ... For sand, it is better to mix light ocher with a small amount of red and white. And make the transition from sea to sand smooth. This can be achieved by putting strokes of “marine” and “sand” colors next to each other, gradually “mixing” one color into another.

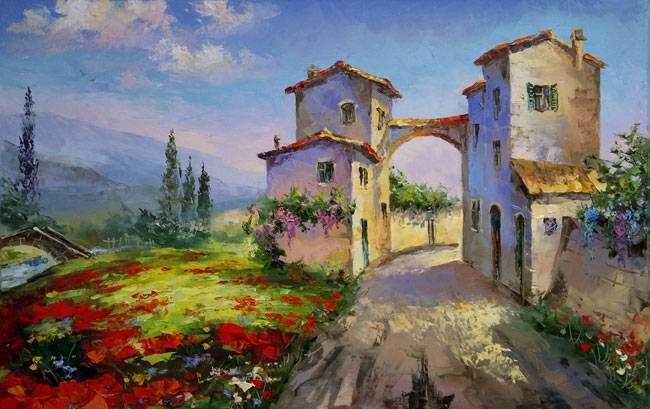
We invite you to paint as many as 4 sunny sea paintings on the course
ITALIAN LANDSCAPE
Meeting frequency: once a week
Level of training of participants: from zero and above.
Broadcast time: 20:00 Moscow time, recording is provided the next day to all participants
Feedback: given by the teacher on all your work during the course and 2 weeks after its completion


Cost of participation
Four online lessons + lesson recordings + feedback during the course
5500 rubles
>>Checkout
It is expensive?
Let's see. The cost of a full-time painting lesson in Moscow is from 1,500 rubles. Add to this the time and money that will be spent on the road. As well as the need to go somewhere in the evening after work or negotiate with grandmothers, a husband or a nanny to look after the children.
Another thing is to pour yourself a cup of tea, entertain loved ones with something interesting or arrange it next to brushes and paints, and DRAW. Online lessons help you do what you want, when it suits you. So much nicer, right?
You can draw such a seascape with children from 5 to 10-11 years old. The work must be done with gouache paints. In general, it is gouache, and not watercolor at all, that is the most convenient material for children's painting. Schools and kindergartens have a lot of “respect” for watercolor, not at all because it is good for children to work with it, but because it is compact and not as “dirty” as gouache. In fact, watercolor is a very difficult medium to work with. She does not forgive mistakes. Any mistake made is almost impossible to correct. Drawing this seascape with children, we can solve quite a few problems. For example, to introduce the child to the concepts of the horizon line, perspective. And, of course, we will learn how to evenly apply paint on paper, drawing lines from one to the other edge of the sheet. Toddlers may not be very good at this, but try to teach them this technique.
To draw a seascape with children, we need:
- A sheet of thick Whatman paper A3 or A4 format;
- Gouache blue, white, green and black;
- Large soft brush (e.g. squirrel #6)
- Brush with stiff bristles;
- Old toothbrush;
- A palette for mixing paints (just a sheet of paper will do);
- A jar of water for rinsing brushes;
- Cloth for wiping brushes.
How to draw the sky in a seascape.
Draw a line with a pencil, dividing the sheet into two unequal parts - 1/3 will be the sky, the rest will be the sea. This line will become the horizon line. Take white and blue gouache, mix them so that you get a blue color of the desired intensity. Paint over the sky by making horizontal strokes with the brush from one edge of the sheet to the other. Since the sky at the top of our painting should be darker, to create the effect of "depth", you can first apply a dark blue stripe, and then paint the sky with blue paint, shading the dark blue stripe.

We draw clouds in the sky.
Apply dots-strokes with white gouache or completely paint over the cucumber clouds. While the paint is still wet, press a crumpled paper towel over the design. This will give the clouds "fluffiness" and blur clear boundaries.

How to draw the sea in a seascape
Take blue paint and cover the bottom of the sheet with it, moving the brush from one edge to the other of the sheet.  Add streaks of green and white paint over the blue layer. The closer to the horizon, the darker the sea.
 Splashes of sea foam can be drawn using the spatter technique. Children of all ages love to work in this technique. For this painting, we need a brush with very hard bristles or a toothbrush. A brush can do this job more accurately, but a brush is easier. Take a brush or brush, dip it in water and then in white paint. Run your index finger over the bristles. There will be white small splashes on the paper. The movement of the finger must be towards you, otherwise the splashes will be on the artist!
  We draw large “lambs” on the waves with a brush with hard bristles. The closer to the horizon line, the smaller the “lambs”, and the smaller the distance between the waves.

Draw the details of the seascape
On the horizon line with black or dark blue paint, write a stone island. Its shape can be completely arbitrary. In the sky, draw black ticks of seagulls.  To draw a ship, put a black dot - this is the stern of a receding sailboat. The dots applied with white paint are the sails.
  If the seascape seems unfinished to you, you can add a few stones.
  Our seascape is completely ready. It remains to dry it and hang it on the wall.


